combined, and Microsoft began its efforts to transition completely to the NT codebase, an event that was originally planned for Windows 2000 but had to be put off until Windows XP, in 2001.
Whew.
The point is that during all of this transition and evolution, Microsoft never changed the user experience, the Windows runtime, and the underlying technologies that developers use all at the same time. But with Windows 8, it has done just that.
Windows 8 includes a completely new user experience we call Metro that offers smartphone-like, full-screen experiences in lieu of (well, in addition to) the old-fashioned “windowed” interface provided by the desktop environment from previous Windows versions. And Metro runs on top of a completely new runtime engine, called Windows Runtime, or WinRT, which in turn offers developers a completely new set of native APIs, with new capabilities and a new way of doing things.
That’s a whole lot of new.
NOTE
Though we are calling this new environment Metro, Microsoft—for legal reasons—is not. One alternative style of naming we’ve seen used, in which Metro is called “the Windows 8 UI,” and Metro-style apps are referred to as “Windows 8 apps,” is, to us, inadequate. Windows 8 provides two user experiences, what we call Metro and the desktop. And both are “Windows 8 UIs” that contains “Windows 8 apps.” So we’re sticking with the Metro name, which has been in use for a couple of years now and which we feel perfectly encapsulates the new environment and the apps that run within it. Yep. We’re rabble-rousers.
Compare this to Windows 7. In Windows 7, Microsoft provided a refined version of the Aero desktop experiences it previously offered in Windows Vista. And Windows 7 ran on top of the same Explorer runtime engine as all Windows versions dating back to Windows 2000, while offering developers the exact same Win32-based APIs, with of course a handful of new capabilities.
Put simply, there’s no comparison.
What You Need to Know
We mentioned previously that we wrote this book for average users, and not technical experts. And that we assume you have used and understand modern Windows versions, especially Windows 7. And that your desire to learn more about Windows 8 has inspired this purchase. We won’t disappoint you.
The book doesn’t need to be read from cover to cover. That said, we do recommend reading through the first five chapters in sequence, if possible, since this is the foundation for understanding how the new operating system works and why things are the way they are. From that point on, feel free to cherry-pick as needed, as you discover and wonder about specific new features.
But before diving into Windows 8, it’s important to understand a few basic concepts, especially if you’ll be utilizing this system on a new tablet computer or similar multi-touch-based device. Throughout this book, we make no assumptions about
So let’s start there.
Those with multi-touch tablets and other touch-based Windows devices will soon discover that Windows 8 works quite naturally, and much like other familiar touch devices such as Windows Phone, iPhone, or Android smartphones or the iPad and other tablets. But Windows 8 is far more sophisticated than these other products, so while the basics are the same, understanding a few key multi-touch gestures and actions is key to getting off on the right foot, er, finger.
Here’s what you need to know.
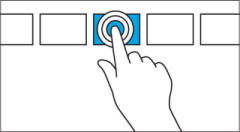
• Tap: To open an item, simply tap it with your finger, as shown in Figure 1. This works identically to clicking the item with the mouse.
Figure 1: Tap an item to open it.
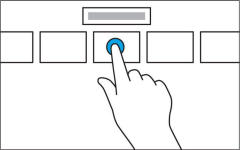
• Tap and hold: To get more information about an item, tap and hold on that item. (Microsoft calls this “press and hold” for some reason.) This works similarly to right-clicking an item with a mouse, and the result is often similar, with a menu appearing providing more information or options. Tap and hold can be seen in Figure 2.
Figure 2: Tap and hold an item to view more information.
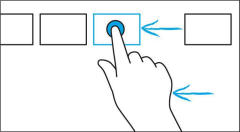
• Slide to drag: With some Windows 8 user experiences, you can tap and hold an item and then drag it to a new location on-screen by swiping your finger slowly in whatever direction you wish to go. This action, which is commonly used for rearranging tiles on the new Windows 8 Start screen, can be seen in Figure 3 and is similar to using a mouse to drag an item around.
Figure 3: After tapping and holding, you can use a slide gesture to move an item.
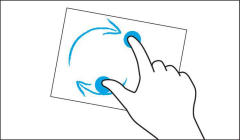
• Pinch to zoom out, stretch to zoom in: Users of touch-based smartphones and tablets are probably familiar with the pinch and stretch methods of zooming out and zooming in a display, respectively. You touch the screen with two fingers simultaneously and then move them away from each other to zoom in, as seen in Figure 4. Or, if you move the two fingers toward each other, you can zoom out. These actions are typically used in apps like Photos or Maps where zooming is a common activity.
Figure 4: Pinch or stretch with two fingers to zoom.

• Rotate: With this fairly uncommon gesture, you can rotate the display either clockwise or counterclockwise. To do so, touch the screen with two fingers simultaneously and then turn your hand in either direction, as in Figure 5. Few apps support this gesture.
Figure 5: Rotate the display with two fingers.
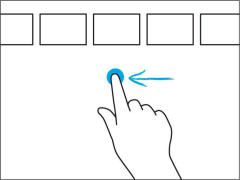
• Slide scrolling: While smartphones often use a vertical form of scrolling, similar to document-based applications like Microsoft Word, Windows 8 was designed to be used in landscape mode by default, and its multiscreen experiences usually scroll from left-to-right, not up and down. To scroll quickly through these multiscreen experiences, you can swipe the display with your finger, as in Figure 6. A swipe to the left will cause the display to scroll to the right.
Figure 6: Scroll through a multiscreen display by swiping with your finger.
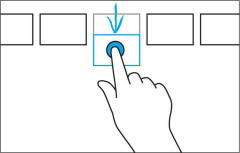
• Swipe selecting: To select an item in Windows 8, you can swipe on that item using a short downward gesture. When you do so, it will typically become visually highlighted in some way, indicating the selection, and additional options will appear, often in an app bar, which can be attached to the top or bottom edge of the screen. A swipe selection gesture can be seen in Figure 7.
Figure 7: A short downward swipe can select an item.
• Edge swiping: Windows 8 provides app-specific and system-wide capabilities via so- called edge user interfaces, or edge UIs. To activate an edge UI, you swipe in toward the center of the screen from an edge. You swipe in from the top or bottom edge of the screen to display an app’s edge UI. And you can trigger various system-level capabilities by swiping in from the left or right edge of the screen. (These actions are further discussed in Chapter 3.) You can see an example of edge swiping in Figure 8.